Recently, one of our readers asked us how to change the sidebar side in a WordPress theme. We get this question a lot where users want to change their sidebar from left to right, or right to left. In this article, we will show you how to change the sidebar side in WordPress.
Why Change The Sidebar Side in WordPress
Usability experts believe that people scan pages from left to right. They recommend putting the important content on the left so that users see the content first. However, this could be reversed if your site is in a language that is written in Right to Left direction.
Many WordPress sites use the typical blog layout with two columns. One for the content, and the other column for the sidebar.
If you are just starting out a website, then you should select a WordPress theme that has the sidebar on your preferred location.
Many themes have options to switch sidebar sides from theme settings. However if your theme does not have this option, then you will have to change sidebar sides manually.
Having said that, let’s take a look at how you can easily change the sidebar side in WordPress using a little bit of CSS.
Changing Sidebar Side in WordPress using CSS
Before you make any changes to your theme, you should first consider creating a child theme. By using a child theme, you will be able to update your parent theme without losing your changes.
Secondly, you should always create a backup of your WordPress site when you are making direct changes to your active WordPress theme.
You will need an FTP client to edit your theme files. See our beginner’s guide on how to use FTP to upload files to WordPress.
Connect to your WordPress site using the FTP client and go to your theme folder. It is usually located at:
/yourwebsite/wp-content/themes/your-theme-folder/
Now you need to download and open your theme’s main stylesheet file in a plain text editor like Notepad. This file is called style.css, and it is located in your theme’s root directory.
In this file, find the CSS class for your sidebar. It is usually .sidebar. In this example, we are using the default WordPress theme Twenty Fifteen which has this CSS to define sidebar:
.sidebar {
		float: left;
		margin-right: -100%;
		max-width: 413px;
		position: relative;
		width: 29.4118%;
	}
As you can see it floats sidebar to the left with a margin of -100% to the right. We will change it to float right and margin-left like this:
.sidebar {
		float: right;
		margin-left: -100%;
		max-width: 413px;
		position: relative;
		width: 29.4118%;
	}
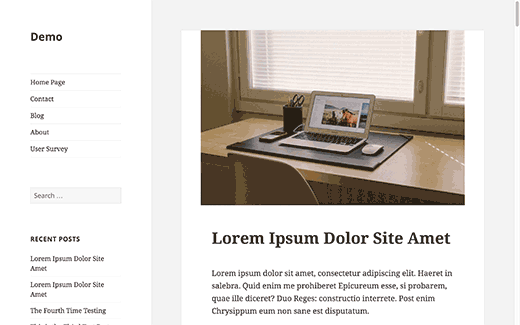
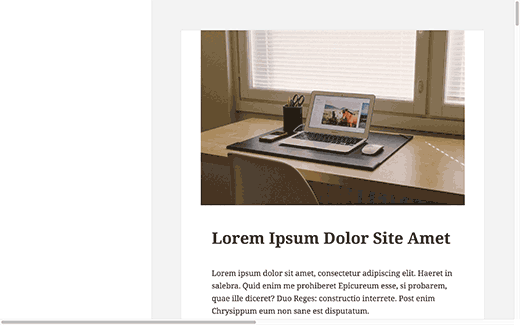
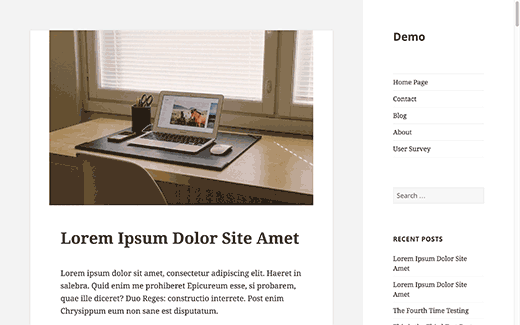
Save your changes and upload style.css file back to your website using FTP client. Now if you visit your website, it will look like this:
That’s because we have moved the sidebar but we did not move the content area. Twenty Fifteen uses this CSS to define the position of content area.
.site-content {
		display: block;
		float: left;
		margin-left: 29.4118%;
		width: 70.5882%;
	}
We will change it to move content to the right. Like this:
.site-content {
		display: block;
		float: left;
		margin-right: 29.4118%;
		width: 70.5882%;
	}
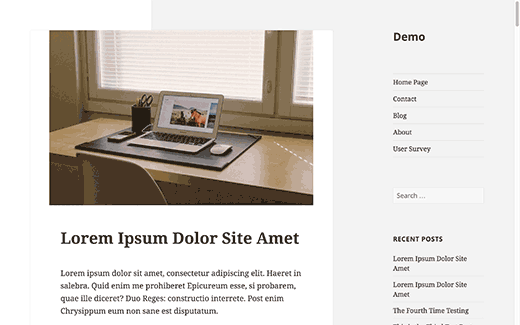
This is how our website looked after applying this CSS.
As you can see that we have switched sides for both content and sidebar areas. However there is still a white block on the left.
You will come across such things when you are working with CSS. It will take some detective work to figure out what’s causing that and how to adjust it.
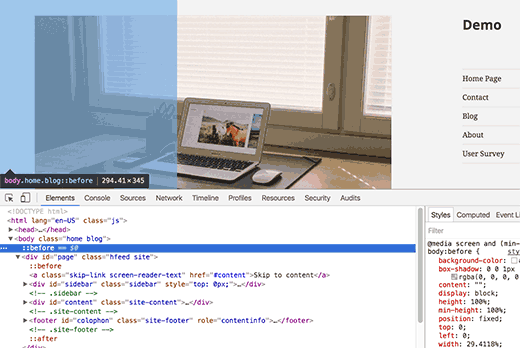
Use your browser’s ‘Inspect’ tool to look at the source code. Point your mouse to the affected region in the browser, right-click and select Inspect from browser menu.
As you move your mouse in the source code view, you will notice the areas it affects highlighted in the live preview. In the right pane, you will be able to see the CSS used for that selected element.
We figured out that this CSS in our stylesheet needs adjusting.
@media screen and (min-width: 59.6875em) {
	body:before {
		background-color: #fff;
		box-shadow: 0 0 1px rgba(0, 0, 0, 0.15);
		content: "";
		display: block;
		height: 100%;
		min-height: 100%;
		position: fixed;
		top: 0;
		left: 0;
		width: 29.4118%;
		z-index: 0; /* Fixes flashing bug with scrolling on Safari */
	}
This CSS code adds an empty content block of 29.4118% width and 100% width to the top left. Here is how we will move it to right.
@media screen and (min-width: 59.6875em) {
	body:before {
		background-color: #fff;
		box-shadow: 0 0 1px rgba(0, 0, 0, 0.15);
		content: "";
		display: block;
		height: 100%;
		min-height: 100%;
		position: fixed;
		top: 0;
		right: 0;
		width: 29.4118%;
		z-index: 0; /* Fixes flashing bug with scrolling on Safari */
	}
After saving and uploading the stylesheet back to the server, this is how our website looked.
Working with CSS can be confusing for beginners. If you don’t want to do all the manual code work, then you may want to try CSS Hero. It allows you to edit CSS without writing any code, and it works with every WordPress theme.
We hope this article helped you change the sidebar side in WordPress. You may also want to see our list of 12 WordPress sidebar tricks to get maximum results.
If you liked this article, then please subscribe to our YouTube Channel for WordPress video tutorials. You can also find us on Twitter and Facebook.
The post How to Change the Sidebar Side in WordPress appeared first on WPBeginner.

Aucun commentaire:
Enregistrer un commentaire